Here are detailed
instructions for setting up accounts in Outlook 2003. For those having
difficulties, We suggest deleting the account from Outlook, shutting down
Outlook, rebooting the machine and restarting Outlook before re-creating the
account. The instructions below are using a demo account created using the ficticious domain.com domain; just substitute your domain name where you see domain.com.
1. Start Outlook
and click Tools from the menu
bar. Then click E-mail
Accounts from the list. The following screen will come
up. Select “Add a new e-mail
account” and click the Next button:

2. On the next screen
select POP3 and click the Next button:

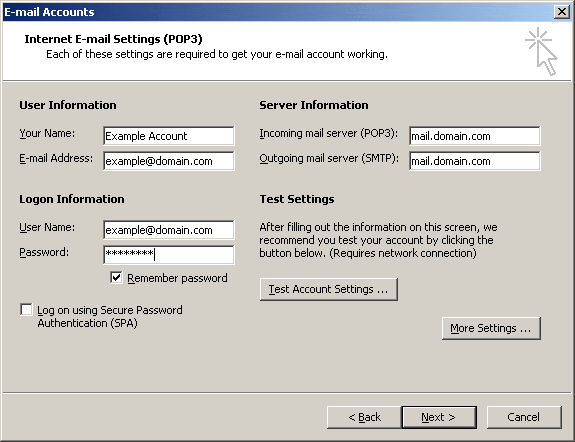
3. Here is where
the main account settings are established. The email account should have already been created in the control panel (http://cp.vishost.net). The email address created there is example@domain.com.
Under
User Information, type in Your Name
(can be anything) and the email address, example@domain.com
Under
Server Information, type
mail.domain.com for both Incoming and Outgoing.
Under Logon Information, the User Name is the
entire email address, example@domain.com. Type in
the password for the account and leave the Remember password box
checked.
4. Click the More Settings button on the screen above to
bring up the following dialog box with the first General tab active.
Under Mail Account, type anything to describe the
name of the account, can be any text.
Under Other User Information, you can leave this
blank if you want or you can type the name of your Organization and the reply
email you want to use (which can be different than the email address you are
setting up)

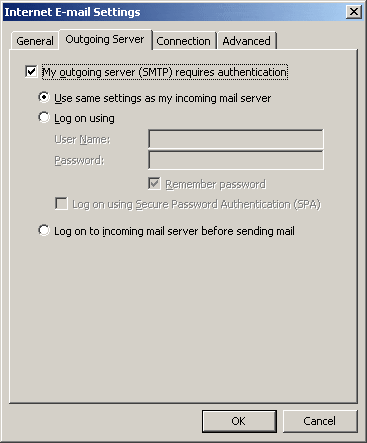
5. Click on the
Outgoing Server tab and make sure
“My outgoing server (SMTP) requires
authentication” is checked and “Use same settings
as my incoming mail server” is selected.
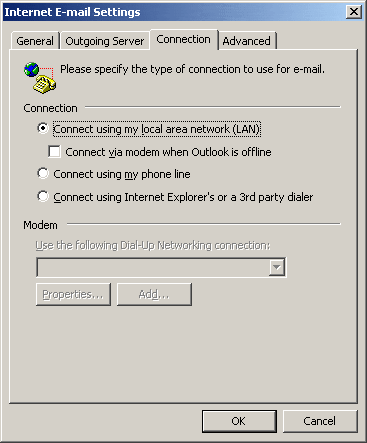
6. Click the Connection tab. Nothing should be
needed here if you are already using Outlook successfully with other email
accounts. Typically you are on a LAN.
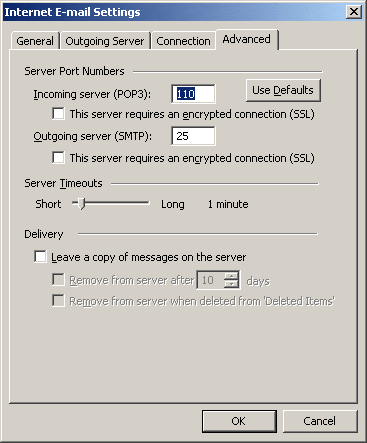
7. Click the
Advanced tab. Here you can
accept the default settings which appear below. Click the OK button.
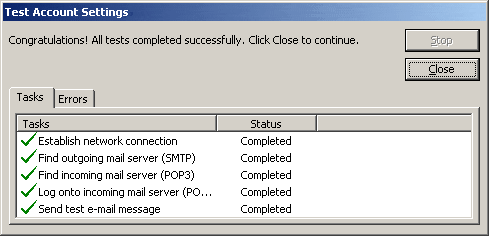
8. From the main
screen, click the Test Account
Settings button and you should see all the tests complete
successfully as shown below. Click the Close button to remove the
screen.
9. Click the Next
button from the main settings screen and you will finish setup with the screen
below. Click Finish.

You should now be able
to hit the Send/Receive button in Outlook to check the server for
email.
Support
Team
Vision Interactive
Systems